Create a secure MCP server in 15 Minutes
Summary
This guide walks through how to expose a service securely as an MCP server, using Civic Auth via the @civic/auth-mcp library.
The full source-code for this guide is available here
Background
You've probably already heard about MCP (Model Context Protocol), the groundbreaking standard that allows LLMs to actually get things done in the real world. But when you start moving your MCP server out of your local dev environment and onto the web, you quickly hit a snag: authentication. After all, when your server lives online, you can't just let anybody use it.
In this guide, we’ll show you how to create an MCP server from scratch, host it alongside your existing web APIs, and secure it using Civic Auth.
Setup
Let's say you already have a working Express-based TODO app.
The backend exposes basic functionality like adding and listing todos.
You're getting user information from an auth header, likely containing a session ID or JWT, using a helper function extractFromAuthHeader.
You also have a simple service layer that manages the actual data.
Here’s what your app.ts might look like:
import express from "express";
import cors from "cors";

const app = express();

app.use(express.json());
app.use(cors());

app.get("/todo", (req, res) => {
  const userId = extractFromAuthHeader(req);
  const todos = service.getTodos(userId);
  res.json(todos);
});

app.post("/todo", (req, res) => {
  const userId = extractFromAuthHeader(req);
  const todo = service.createTodo(userId, req.body);
  res.status(201).json(todo);
});

app.listen(3000, () => console.log("Todo app listening on port 3000"));
You don’t need to worry about how extractFromAuthHeader or service are implemented for now.
We're focusing purely on adding MCP support and protecting that with Civic Auth.
Step 1: Install Dependencies
Start by installing the libraries you'll need:
npm install @modelcontextprotocol/sdk @civic/auth-mcp zod
Step 2: Set Up the MCP Server
Let's create the MCP server instance. Think of this as the central controller where you’ll register tools for your LLM to use:
import { McpServer } from "@modelcontextprotocol/sdk/server/mcp";

const mcpServer = new McpServer({
  name: "todo-mcp-server",
  version: "0.0.1",
});
That’s it! The server exists. But right now, it doesn’t do anything. Let’s fix that by registering a tool.
Step 3: Register an MCP Tool
A "tool" in MCP is just a function your LLM can call. Let’s wire up a tool to list todos:
mcpServer.tool(
  "list-todos",
  "List your current todos",
  {},
  async (_, extra) => {
    const userId = "placeholder-user"; // We'll hook up auth later
    const todos = service.getTodos(userId);
    return {
      content: [{ type: "text", text: JSON.stringify(todos) }],
    };
  }
);
This registers a tool with a name, a short description, some input parameters (we don’t need any yet), and an async handler function.
Let's register another tool to add todos:
mcpServer.tool(
  "add-todo",
  "Add a new todo item",
  {
    text: z.string().describe("The content of the todo item"),
  },
  async (input, extra) => {
    const userId = "placeholder-user";
    const newTodo = service.createTodo(userId, { text: input.text });
    return {
      content: [{ type: "text", text: `Created todo: ${newTodo.text}` }],
    };
  }
);
This tool demonstrates how to define typed input parameters and use them in your handler.
A note on names and descriptions
The names and descriptions that you give to your tool and its parameters are important!
This helps the LLM to understand when and how to call your tool.
The clearer and more descriptive the better. Think of this as a part of the prompt that you send to the LLM.
However, just like with a prompt, more is not always better.
Avoid piling huge amounts of information into the descriptions, but keep things concise and clear, with plenty of examples.
Step 4: Expose Your Server with a Transport Layer
OK, we have a "server", but currently no way to talk to it.
MCP is "transport-agnostic". This means it works with a number of different communication protocols. Since we have a web app, we’re going to use HTTP.
The SDK provides a default HTTP transport to help wire up requests from an HTTP client to your tools.
import { StreamableHTTPServerTransport } from "@modelcontextprotocol/sdk/server/streamableHttp";

const transport = new StreamableHTTPServerTransport({
  // this will be a 'stateless' transport,
  // so no session IDs should be generated
  sessionIdGenerator: undefined,
});
What is Streamable HTTP?
Streamable HTTP allows responses to be sent progressively, as they're generated.
Unlike WebSockets, it's a request-response pattern. Great for tools where streaming is useful, but persistent bidirectional connections aren't needed.
Step 5: Adding the transport to your app
It's time to add this transport to your Express app.
Let’s create a function that puts the MCP server and transport together. We will be creating new ones on every single request.
You’ve already seen how to create the server and register tools. We’ll just move that into a function:
async function getServer() {
  const server = new McpServer(...);

  // Register tools here
  // (use the same tool registration code as above)

  const transport = ...;

  await server.connect(transport);
  return { transport, server };
}
Now we can wire this into an Express route. By convention, MCP servers use path /mcp.
app.post("/mcp", async (req, res) => {
  const { transport, server } = await getServer();
  await transport.handleRequest(req, res, req.body);
  res.on("close", () => {
    transport.close();
    server.close();
  });
});
Why create a new server on each request?
The MCP SDK documentation recommends keeping transports and servers isolated between sessions.
Since our endpoints are stateless, this means creating (and destroying) a server for each request.
Don't worry, this is not an expensive operation.
Your Express app is now an MCP server! You can already give it a whirl...
A common tool to test MCP servers is the MCP Inspector.
npx @modelcontextprotocol/inspector
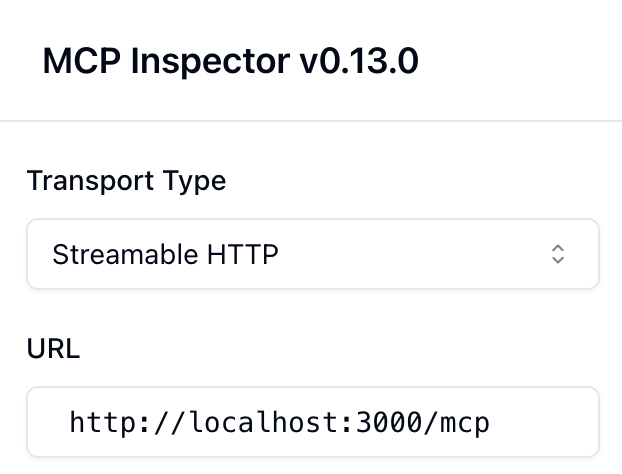
Add your app's url, make sure you choose "Streamable HTTP" as the transport, click "Connect" and then "List tools".
Step 6: Time for Auth
Remember this line added back when we were defining the tools?
const userId = "placeholder-user"; // We'll hook up auth later
It's time to deal with it. But good news! This is probably the easiest bit of the entire tutorial. Simply import the Civic Auth middleware...
import { auth } from "@civic/auth-mcp";
...and add it to your app
app.use(await auth());
Now, in your tool definitions, replace the placeholder line with this:
const userId = extra.authInfo?.extra?.sub;
This is doing a few things:
- Firstly, it is registering your app as an OAuth2.0 Resource Server. If you restart your app, and visit http://localhost:3000/.well-known/oauth-protected-resource, you'll see the protected resource metadata. That tells clients how to authenticate against your app.
- Secondly, it adds middleware to your /mcp route, ensuring only authorized clients can access your MCP server.
- Finally, it adds information about the caller to the request, so that your service layer knows who is calling it.
What is Civic Auth?
Civic Auth is a developer-friendly OAuth2/OIDC-based solution for AI-ready, privacy-preserving authentication.
Learn more: www.civic.com | docs.civic.com
Advanced Features and Configuration
The @civic/auth-mcp library is flexible, and doesn't box you in - you can use it with any OAuth2.0-compatible auth server:
app.use(await auth({
  wellKnownUrl: "<auth server>/.well-known/openid-configuration"
}));
What if I'm not using Express?
No problem. The @civic/auth-mcp library is framework-agnostic and works with any Node-based server.
Refer to the framework-agnostic guide for details.
What's next?
MCP is transitioning from local to hosted environments. Civic Auth is the first step toward safely sharing your tools with the world.
Client support is evolving. If you're building in this space, explore @civic/auth-mcp's client utilities and contribute!
Need help?
- 💬 Contact Civic in our developer community
- 🐦 Follow us on Twitter/X
- 💼 Connect on LinkedIn