App Integration
This guide is for app builders who want to connect their own application to Civic — where your app has its own users and you need each user to get their own Civic access. If you just need a token to plug into a third-party agent platform (like OpenAI Agent Builder or n8n), see Civic Tokens instead.
Civic exposes its capabilities through a single MCP endpoint at https://app.civic.com/hub/mcp. Every request to this endpoint must carry a valid access token issued by Civic Auth (auth.civic.com).
How access tokens work
Access tokens are JWTs issued by Civic Auth. Each token is scoped to a specific application (identified by a CLIENT_ID), which determines what a user is allowed to do — which tools they can call, which third-party services they can connect, and what data they can access.
Setting up your integration
The Settings → Integration page in your Civic account provides a guided setup that walks you through connecting your app to Civic. The setup has three steps:
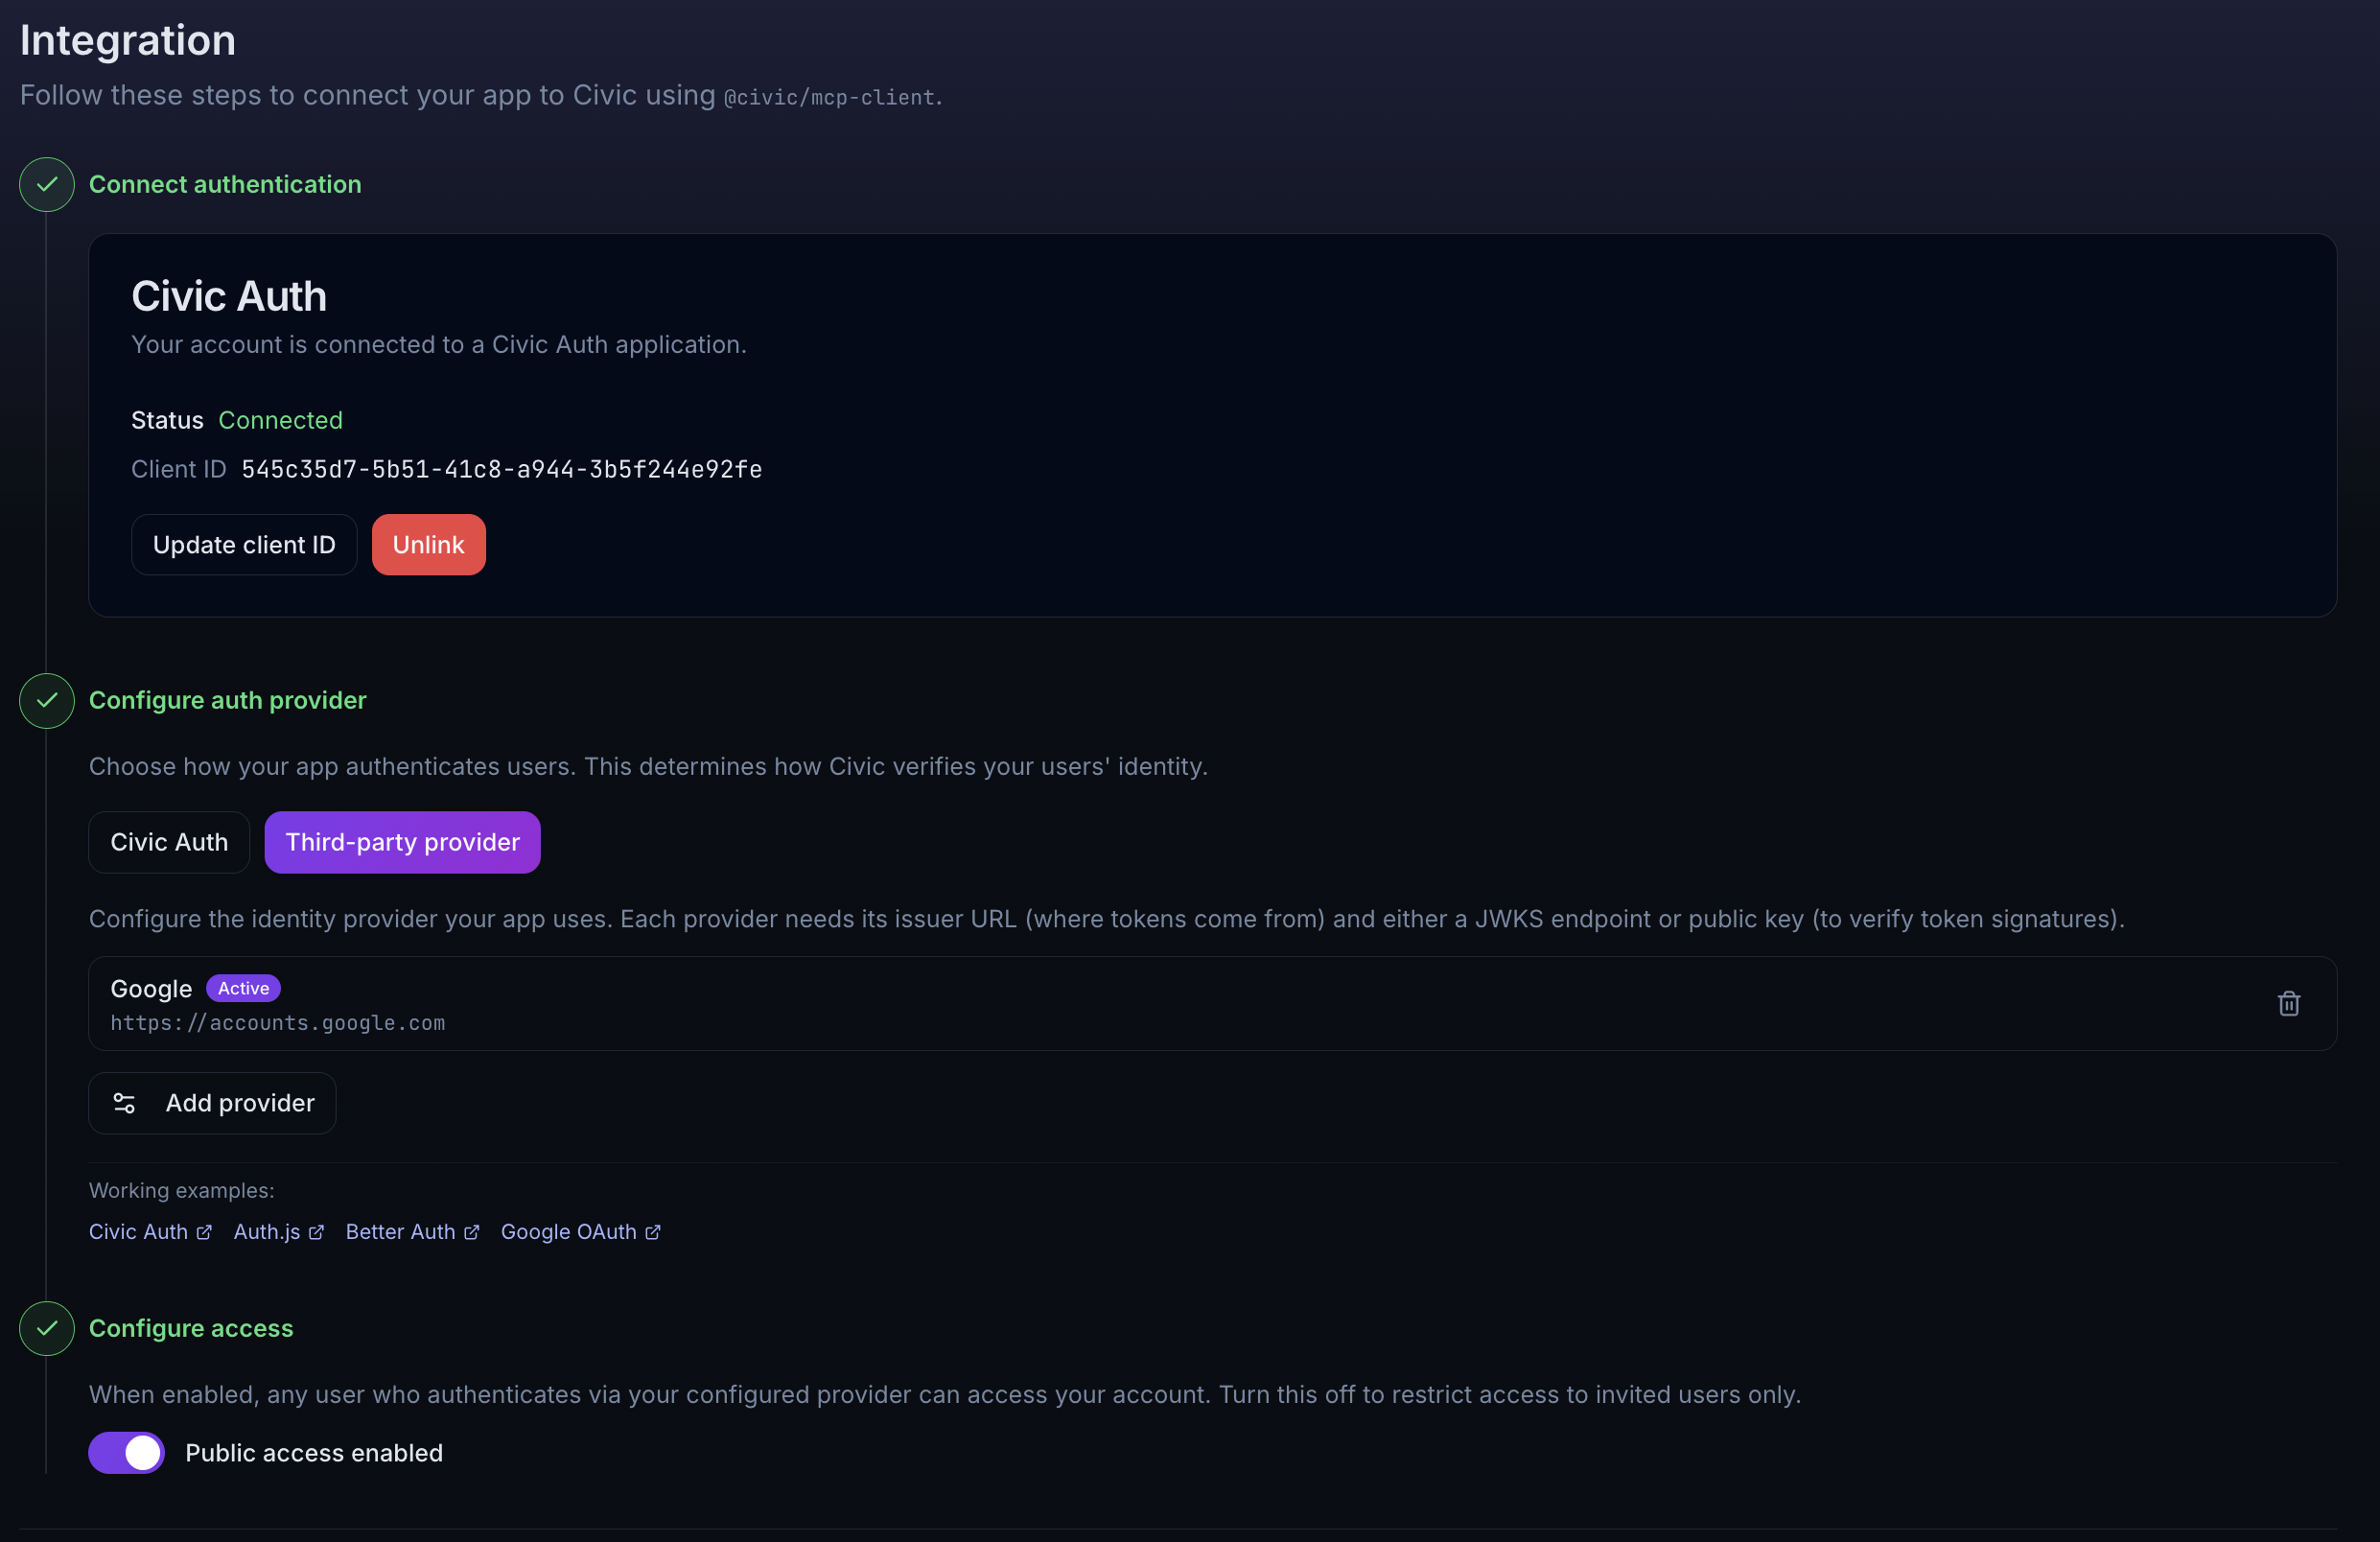
Step 1: Connect authentication
Create or link a Civic Auth application to your account. You have two options:
- Create new auth connection — Civic automatically creates a Civic Auth application, securely stores the credentials, links the Client ID to your account, and enables public access. This is the fastest way to get started.
- Link existing — If you already have a Civic Auth application registered at auth.civic.com, enter your Client ID and Client Secret to link it. The secret is stored encrypted and used to manage token exchange configuration on your behalf.
Once connected, the Integration page displays your credentials (CIVIC_CLIENT_ID and, for the token exchange path, CIVIC_CLIENT_SECRET) as environment variables ready to copy into your app's .env file.
Step 2: Configure your auth provider
Choose how your application authenticates users. This determines how Civic verifies your users' identity.
Best for: Applications that don't have an existing identity provider, or that want the simplest integration path.
With Civic Auth, your users' tokens work directly with Civic — no token exchange setup is needed. Use @civic/auth in your app and the user's session token is automatically valid for Civic API calls.
No additional configuration is required for this path.
See the Civic Auth demo for a complete working example.
Best for: Applications that already have their own authentication system.
Choose this path if your app uses any of the following:
- Auth.js (NextAuth) — any Auth.js provider (Google, GitHub, email, etc.)
- Better Auth — any Better Auth provider
- Google OAuth directly
- Auth0, Azure AD / Entra ID, Okta, or any other OIDC-compliant identity provider
Configure the identity provider your app uses directly from the Integration page. Each provider needs:
- Issuer URL — Where tokens come from (e.g.
https://accounts.google.com) - JWKS endpoint or public key — To verify token signatures
The Integration page provides presets for common providers (Google, Auth0) or you can configure a custom provider. This configures the Token Exchange flow so that tokens from your identity provider can be exchanged for Civic access tokens.
Provider configuration is managed through the Civic UI — you do not need to configure token exchange separately at auth.civic.com.
Working examples:
- Auth.js (NextAuth) — federated token exchange with Auth.js providers
- Better Auth — federated token exchange with Better Auth
- Google OAuth — direct Google OAuth integration
Step 3: Configure access
Control whether new users can join your account automatically:
- Public access enabled — Any user who authenticates via your configured provider can access your account with an
END_USERrole. - Public access disabled (default) — Only invited users can access the account. Their access token must have both a matching email and Client ID.
Connecting to Civic
Once setup is complete, your app needs to obtain a Civic access token for each user and use it to connect to the MCP endpoint. There are two ways to do this.
Using @civic/mcp-client (recommended)
The @civic/mcp-client SDK handles authentication and token exchange for you — each user gets their own scoped connection. The code differs slightly depending on your auth provider.
import { getTokens } from "@civic/auth/nextjs";
const tokens = await getTokens();

const client = new CivicMcpClient({
  auth: { token: tokens.accessToken },
});
const client = new CivicMcpClient({
  auth: {
    tokenExchange: {
      clientId: process.env.CIVIC_CLIENT_ID,
      clientSecret: process.env.CIVIC_CLIENT_SECRET,
      subjectToken: () => getSessionToken(), // from your auth provider
    },
  },
  civicProfile: process.env.CIVIC_PROFILE_ID, // optional: lock the client to this profile
});
The subjectToken function should return a JWT from your identity provider (e.g. the session token from Auth.js, Better Auth, or a Google ID token). The SDK handles the token exchange automatically.
Then use the client with your AI SDK:
const tools = await client.getTools(vercelAIAdapter());
const result = streamText({
  model,
  messages,
  tools,
});
Direct Civic Auth integration — simplest path
Federated token exchange with Auth.js (NextAuth)
Federated token exchange with Better Auth
Direct Google OAuth token exchange
Direct API access
If you are not using @civic/mcp-client (e.g. from a non-JavaScript stack or a custom MCP client), your backend needs to obtain a Civic access token for each user and pass it when calling the hub.
This is different from Civic Tokens, which are single-user tokens generated manually from the Install page for use with agent platforms. The flow described here is programmatic and per-user — your app exchanges each user's identity token for a Civic access token at runtime.
If using Civic Auth: The access token from your Civic Auth session is already valid — pass it directly.
If using a third-party provider: Your backend exchanges each user's identity token for a Civic access token via the Token Exchange endpoint (POST https://auth.civic.com/oauth/token). See the Token Exchange guide for the full protocol details, including request parameters, provider configuration examples, and code samples.
Once you have a Civic access token, pass it in the Authorization header:
POST https://app.civic.com/hub/mcp
Content-Type: application/json
Authorization: Bearer <civic-access-token>
If your account has multiple profiles configured, include the x-civic-profile-id header to scope requests to a specific profile:
x-civic-profile-id: <your-profile-uuid>
Scoping access via token exchange
The token exchange grant supports an optional parameter to narrow the scope of the resulting access token:
civic_profile: Profile ID (UUID) to include as a claim in the exchanged token.
Since a linked Civic Auth application is already scoped to the account by default (via the Client ID), these parameters are primarily useful for restricting access to a specific profile or toolkit within the account — for example, limiting a user or agent to a single toolkit rather than the entire organization.
Credential locking: When civic_profile is present in the exchanged token, the profile is automatically locked. A locked profile can only access credentials that have been explicitly assigned to it — unassigned credentials are not resolved. New credentials authenticated through the scoped token are automatically assigned to the profile. If you are migrating to profile-scoped tokens, review your credential assignments to ensure existing credentials are assigned to the relevant profiles.