What are Toolkits?
Toolkits allow you to create focused groups of MCP servers that work together for specific tasks or workflows. Instead of connecting to all your available tools at once (which can confuse AI assistants), toolkits let you create targeted combinations optimized for particular use cases.Why use toolkits? When AI assistants have access to too many tools at once, they can struggle to choose the right ones. Toolkits solve this by creating focused, task-specific tool groups.
Toolkits vs Skills
Toolkits and Skills are complementary but distinct. Understanding the difference prevents confusion when building agent workflows.| Toolkit | Skill | |
|---|---|---|
| What it is | A set of tools (MCP servers) | A set of instructions and business context |
| How it works | Switch to it | Load on top of the current toolkit |
| Purpose | Defines what tools are available | Defines how to use them |
| Replaces current context? | Yes | No — layers on top |
| Multiple active at once? | No | Yes |
| Example | ”Support” toolkit with Gmail + Slack | ”Escalation Procedures” skill |
Skills
Learn how to create and load Skills for reusable AI capabilities
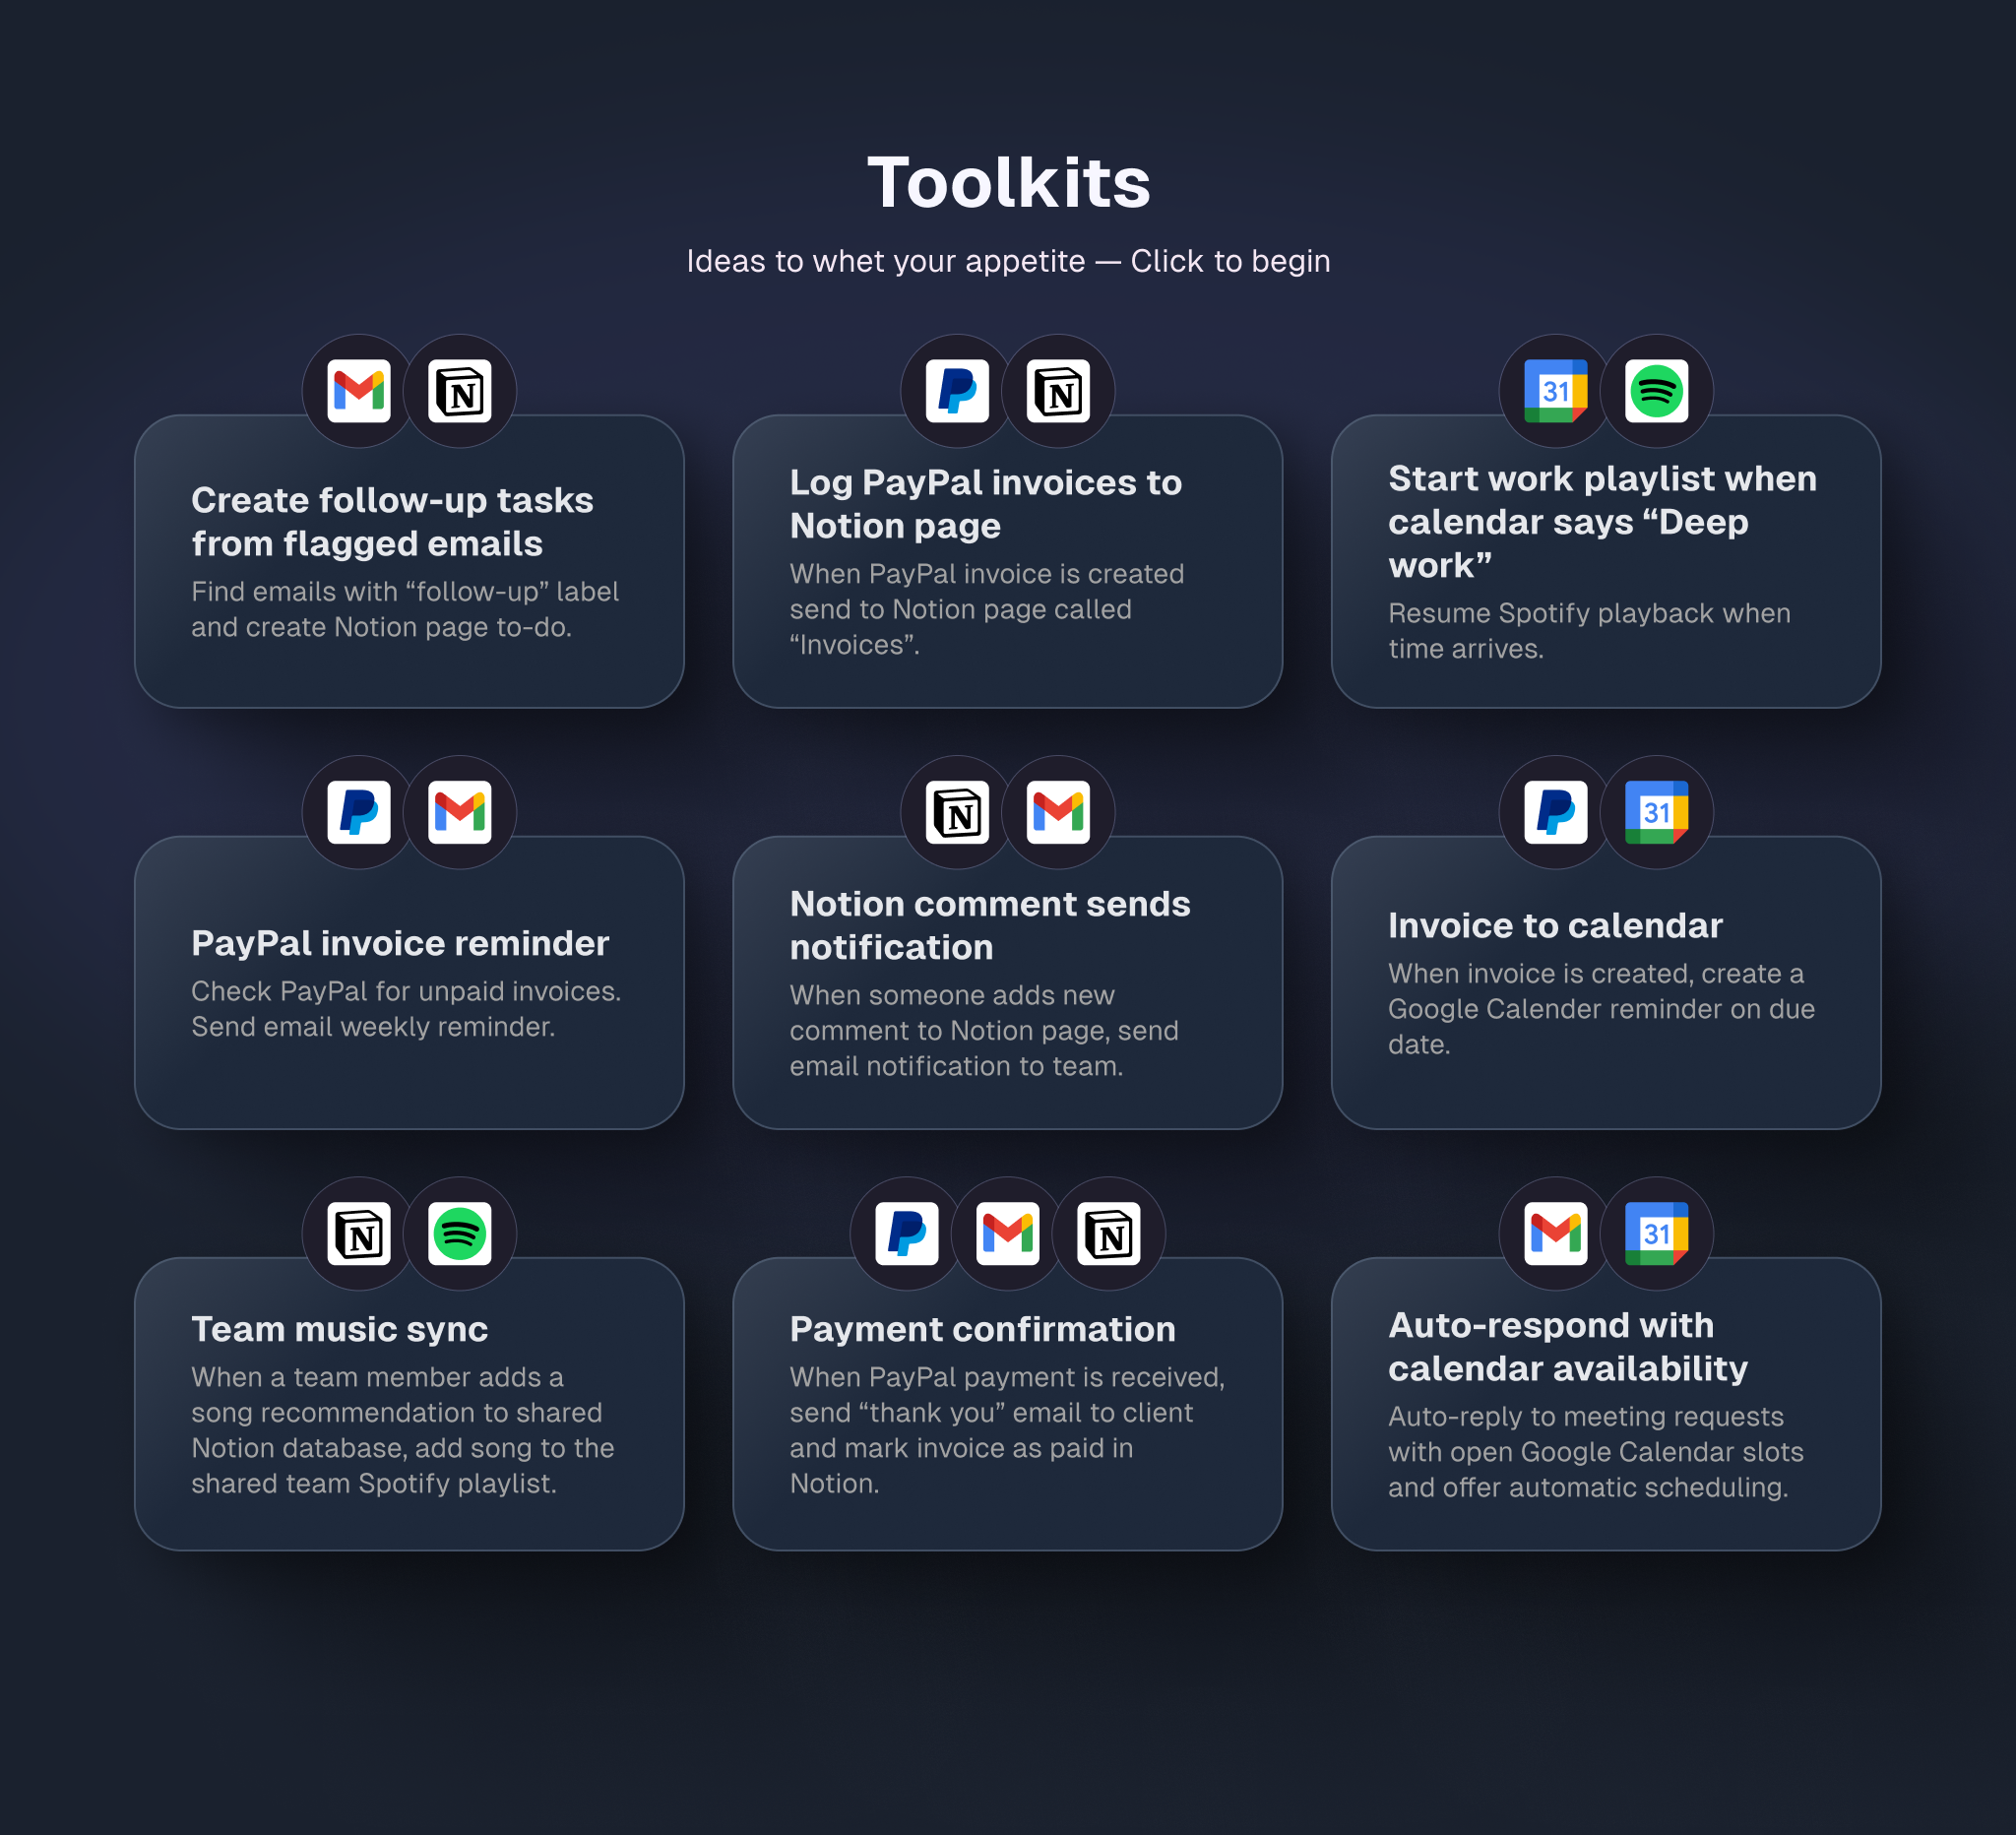
Common Toolkit Examples
Marketing Analytics
Tools: Google Analytics + Notion + SlackPerfect for marketing teams who need to pull analytics data, document insights, and share reports with the team.
Developer Debugging
Tools: GitHub + PostgreSQL + NotionIdeal for developers who need to investigate issues, query databases, and document solutions.
Content Creation
Tools: Linear + GitHub + SlackGreat for product teams managing feature requests, code reviews, and team communication.
Customer Support
Tools: Notion + HubSpot + SlackExcellent for support teams who need to access customer data, update tickets, and coordinate responses.
How to Create a Toolkit
Creating a toolkit takes just a few steps and lets you build focused tool groups for your specific workflows.Create New Toolkit
Click the ”+ Create toolkit” button in the top navigation, next to your current toolkit name.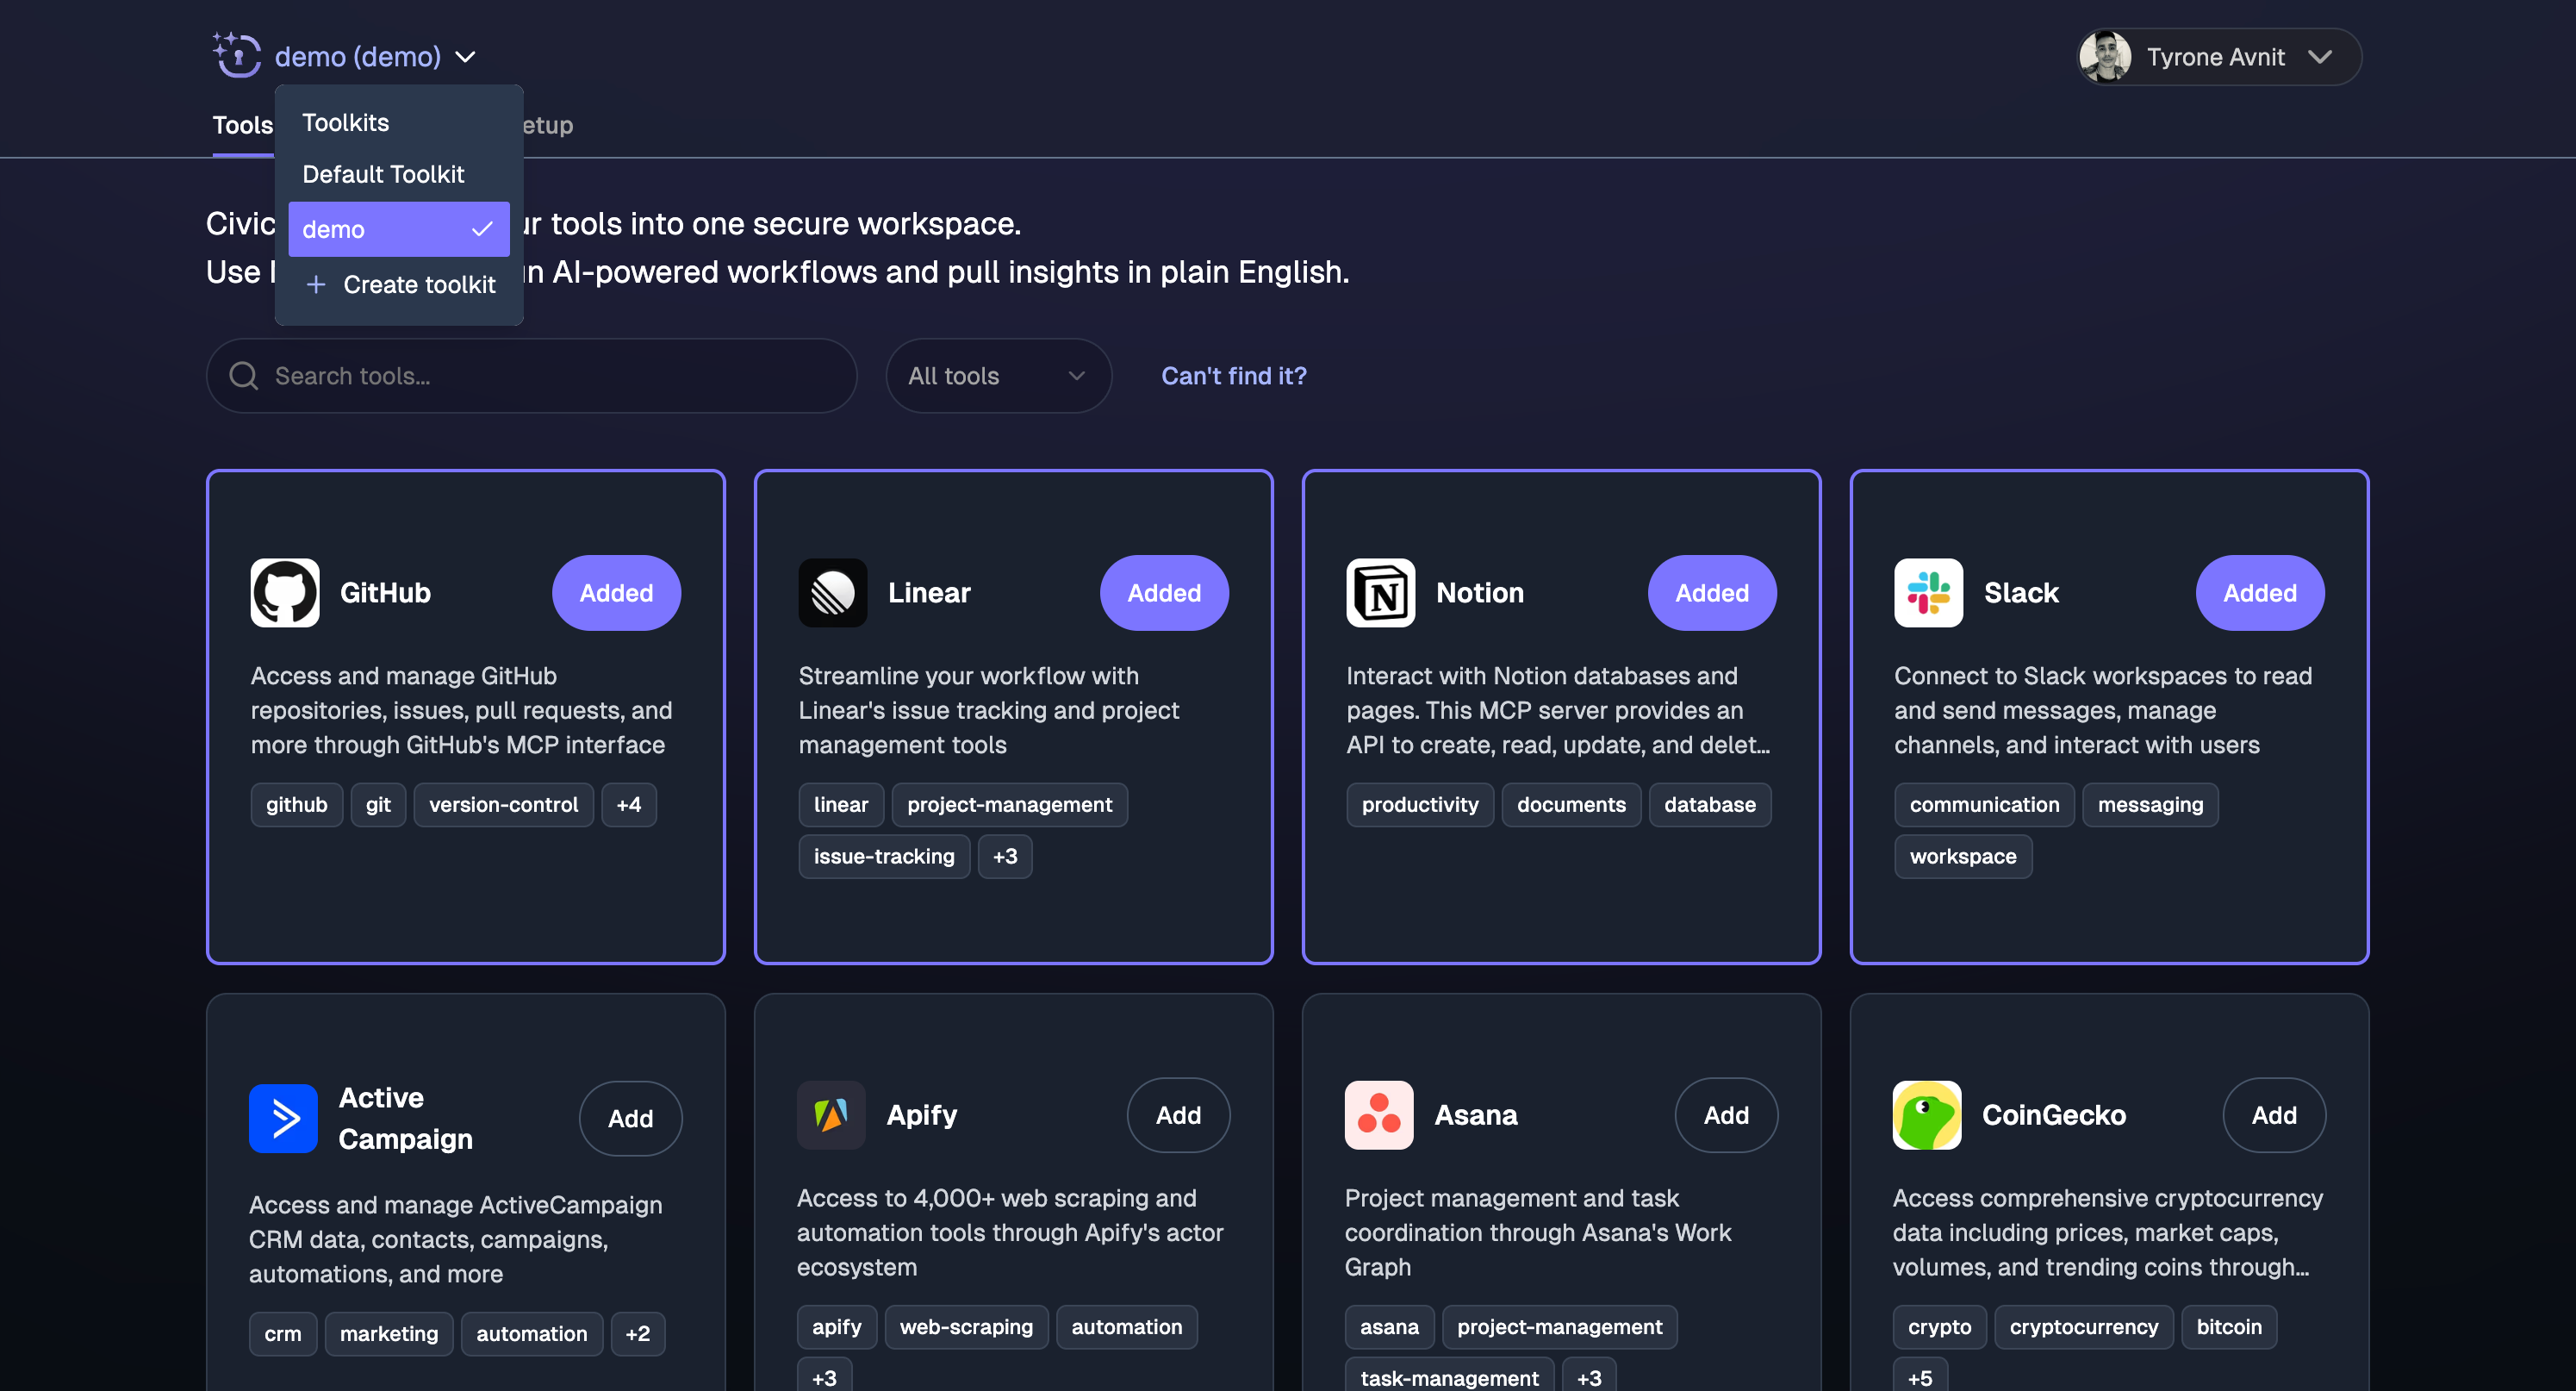
Name Your Toolkit
Give your toolkit a descriptive name and URL alias. This helps you and your team understand what the toolkit is designed for.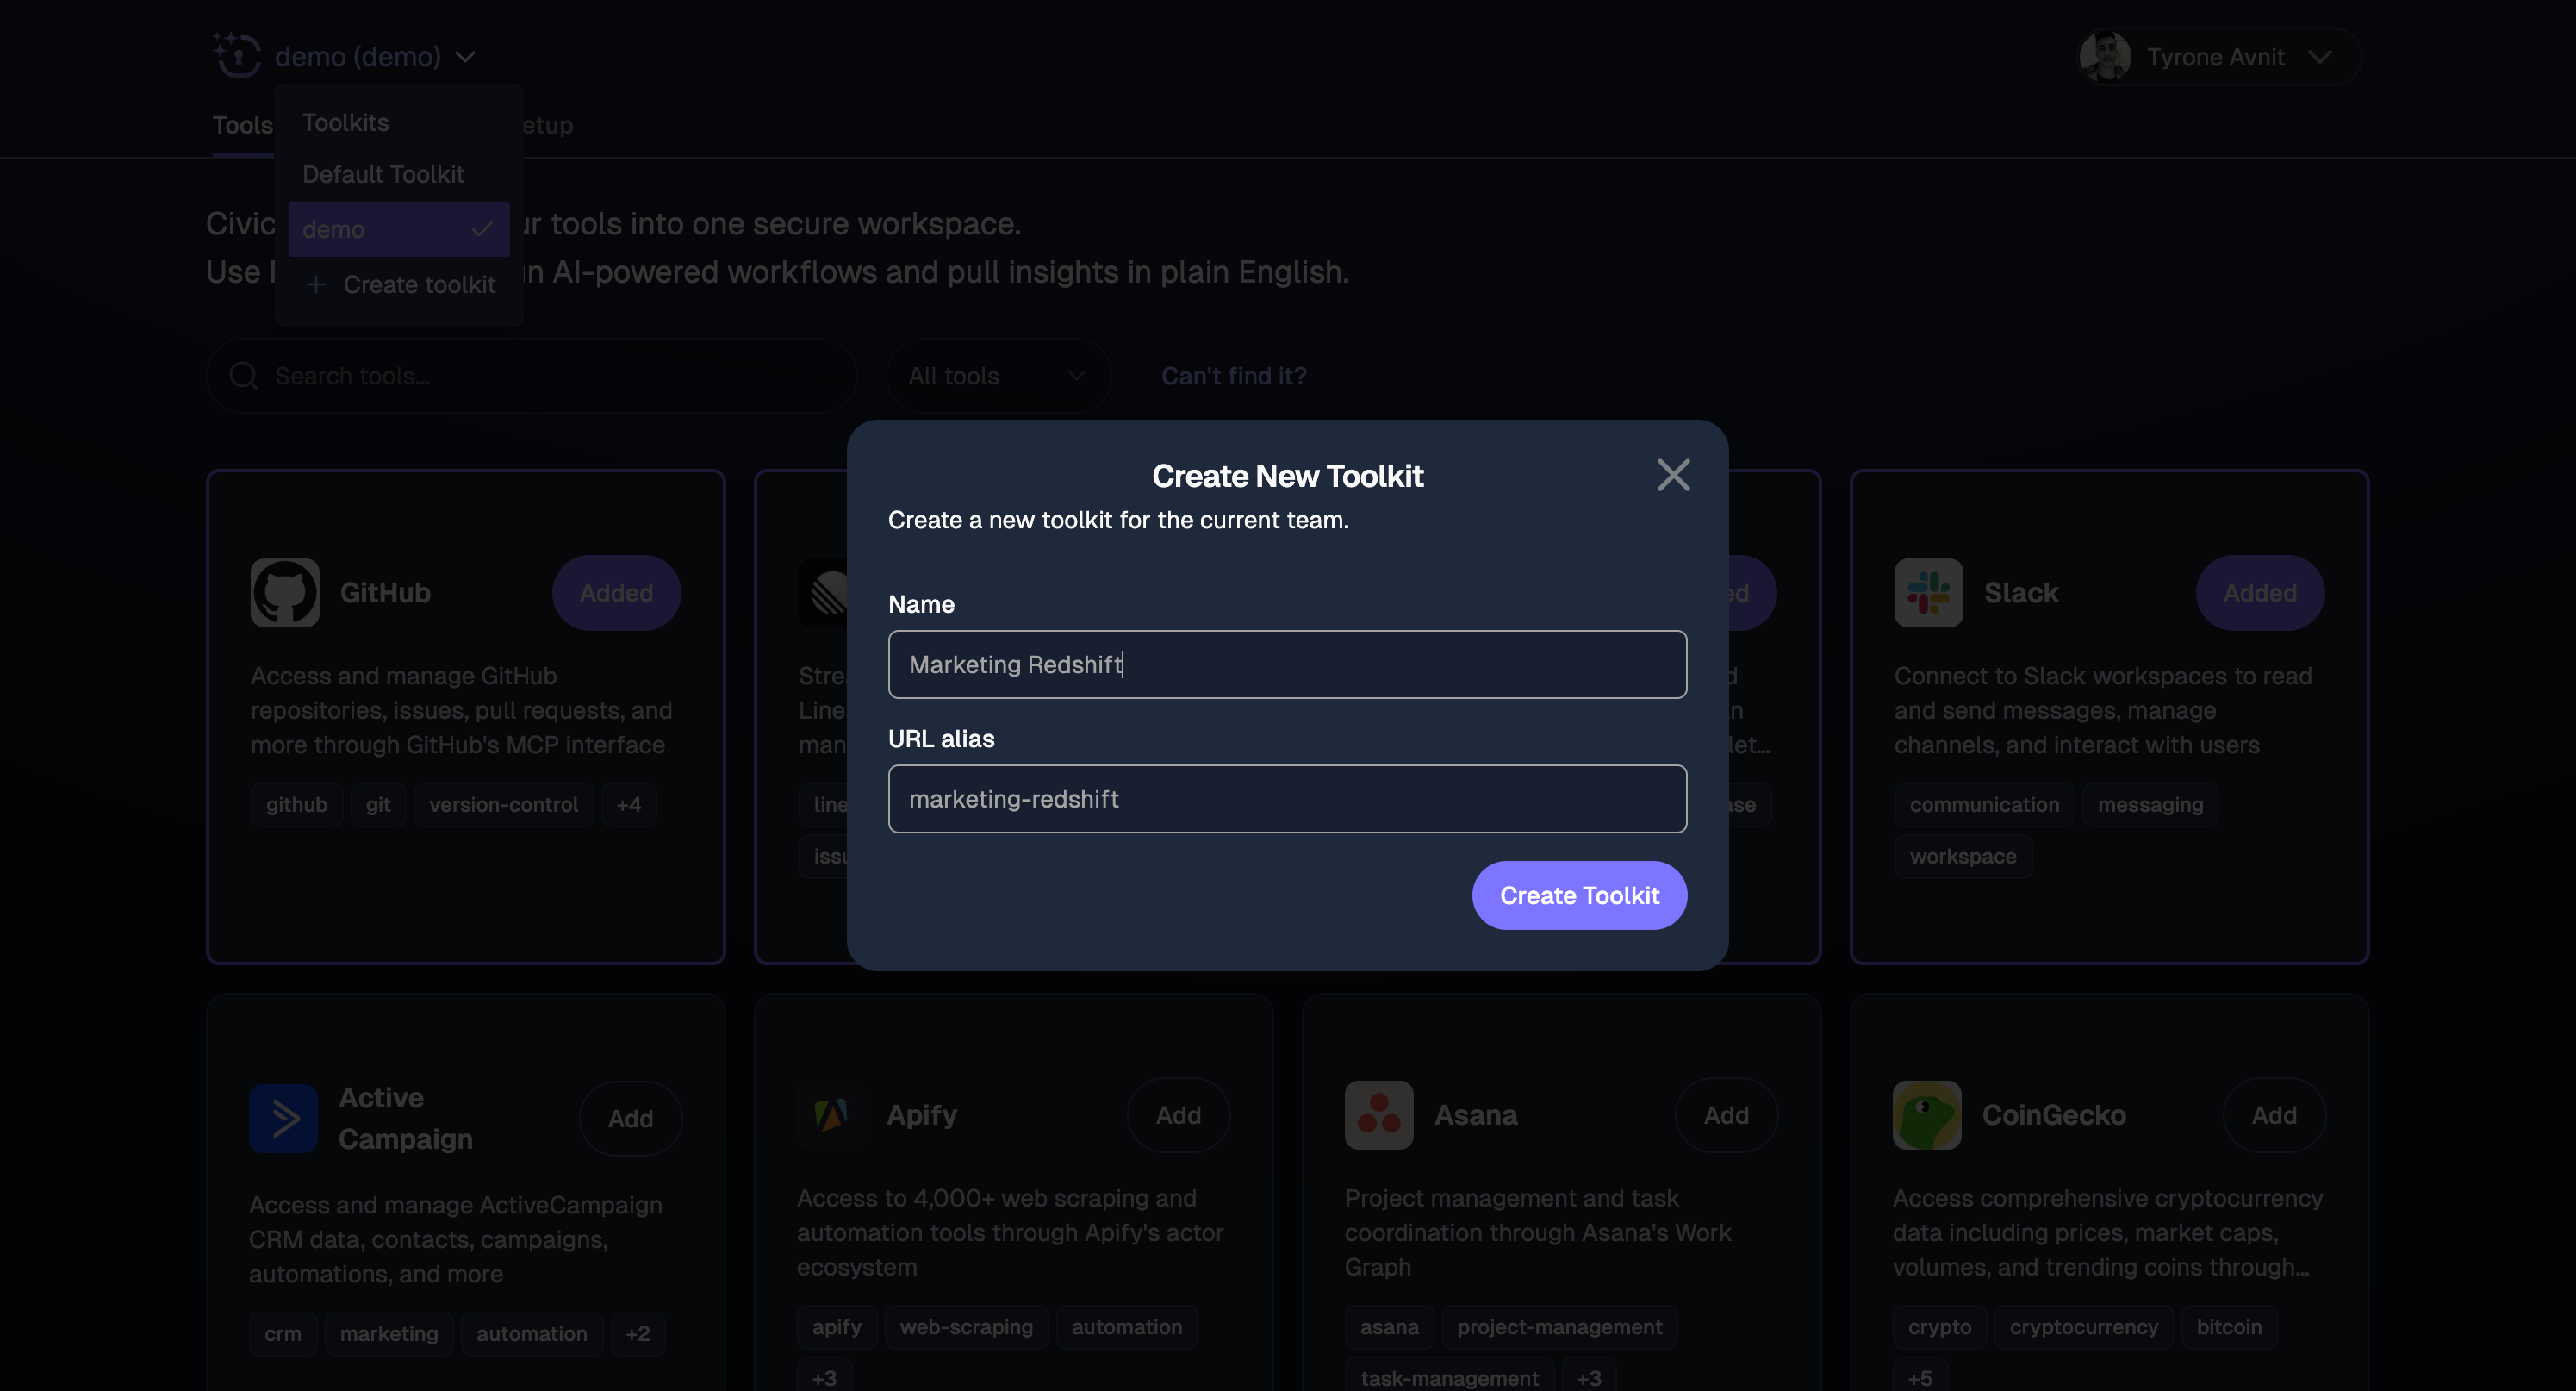
- “Marketing Redshift” (for marketing analytics)
- “Debug Kit” (for development troubleshooting)
- “Content Pipeline” (for content creation workflow)
How to Delete a Toolkit
Method 1: Using chat
Ask in the chat for your toolkit to be deleted. For example:Method 2: Using the toolkits drop-down
Open the toolkits dropdown at the top of the page and click the gear icon. Delete buttons will appear next to each toolkit’s name.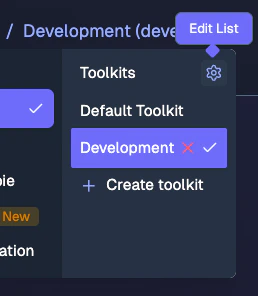
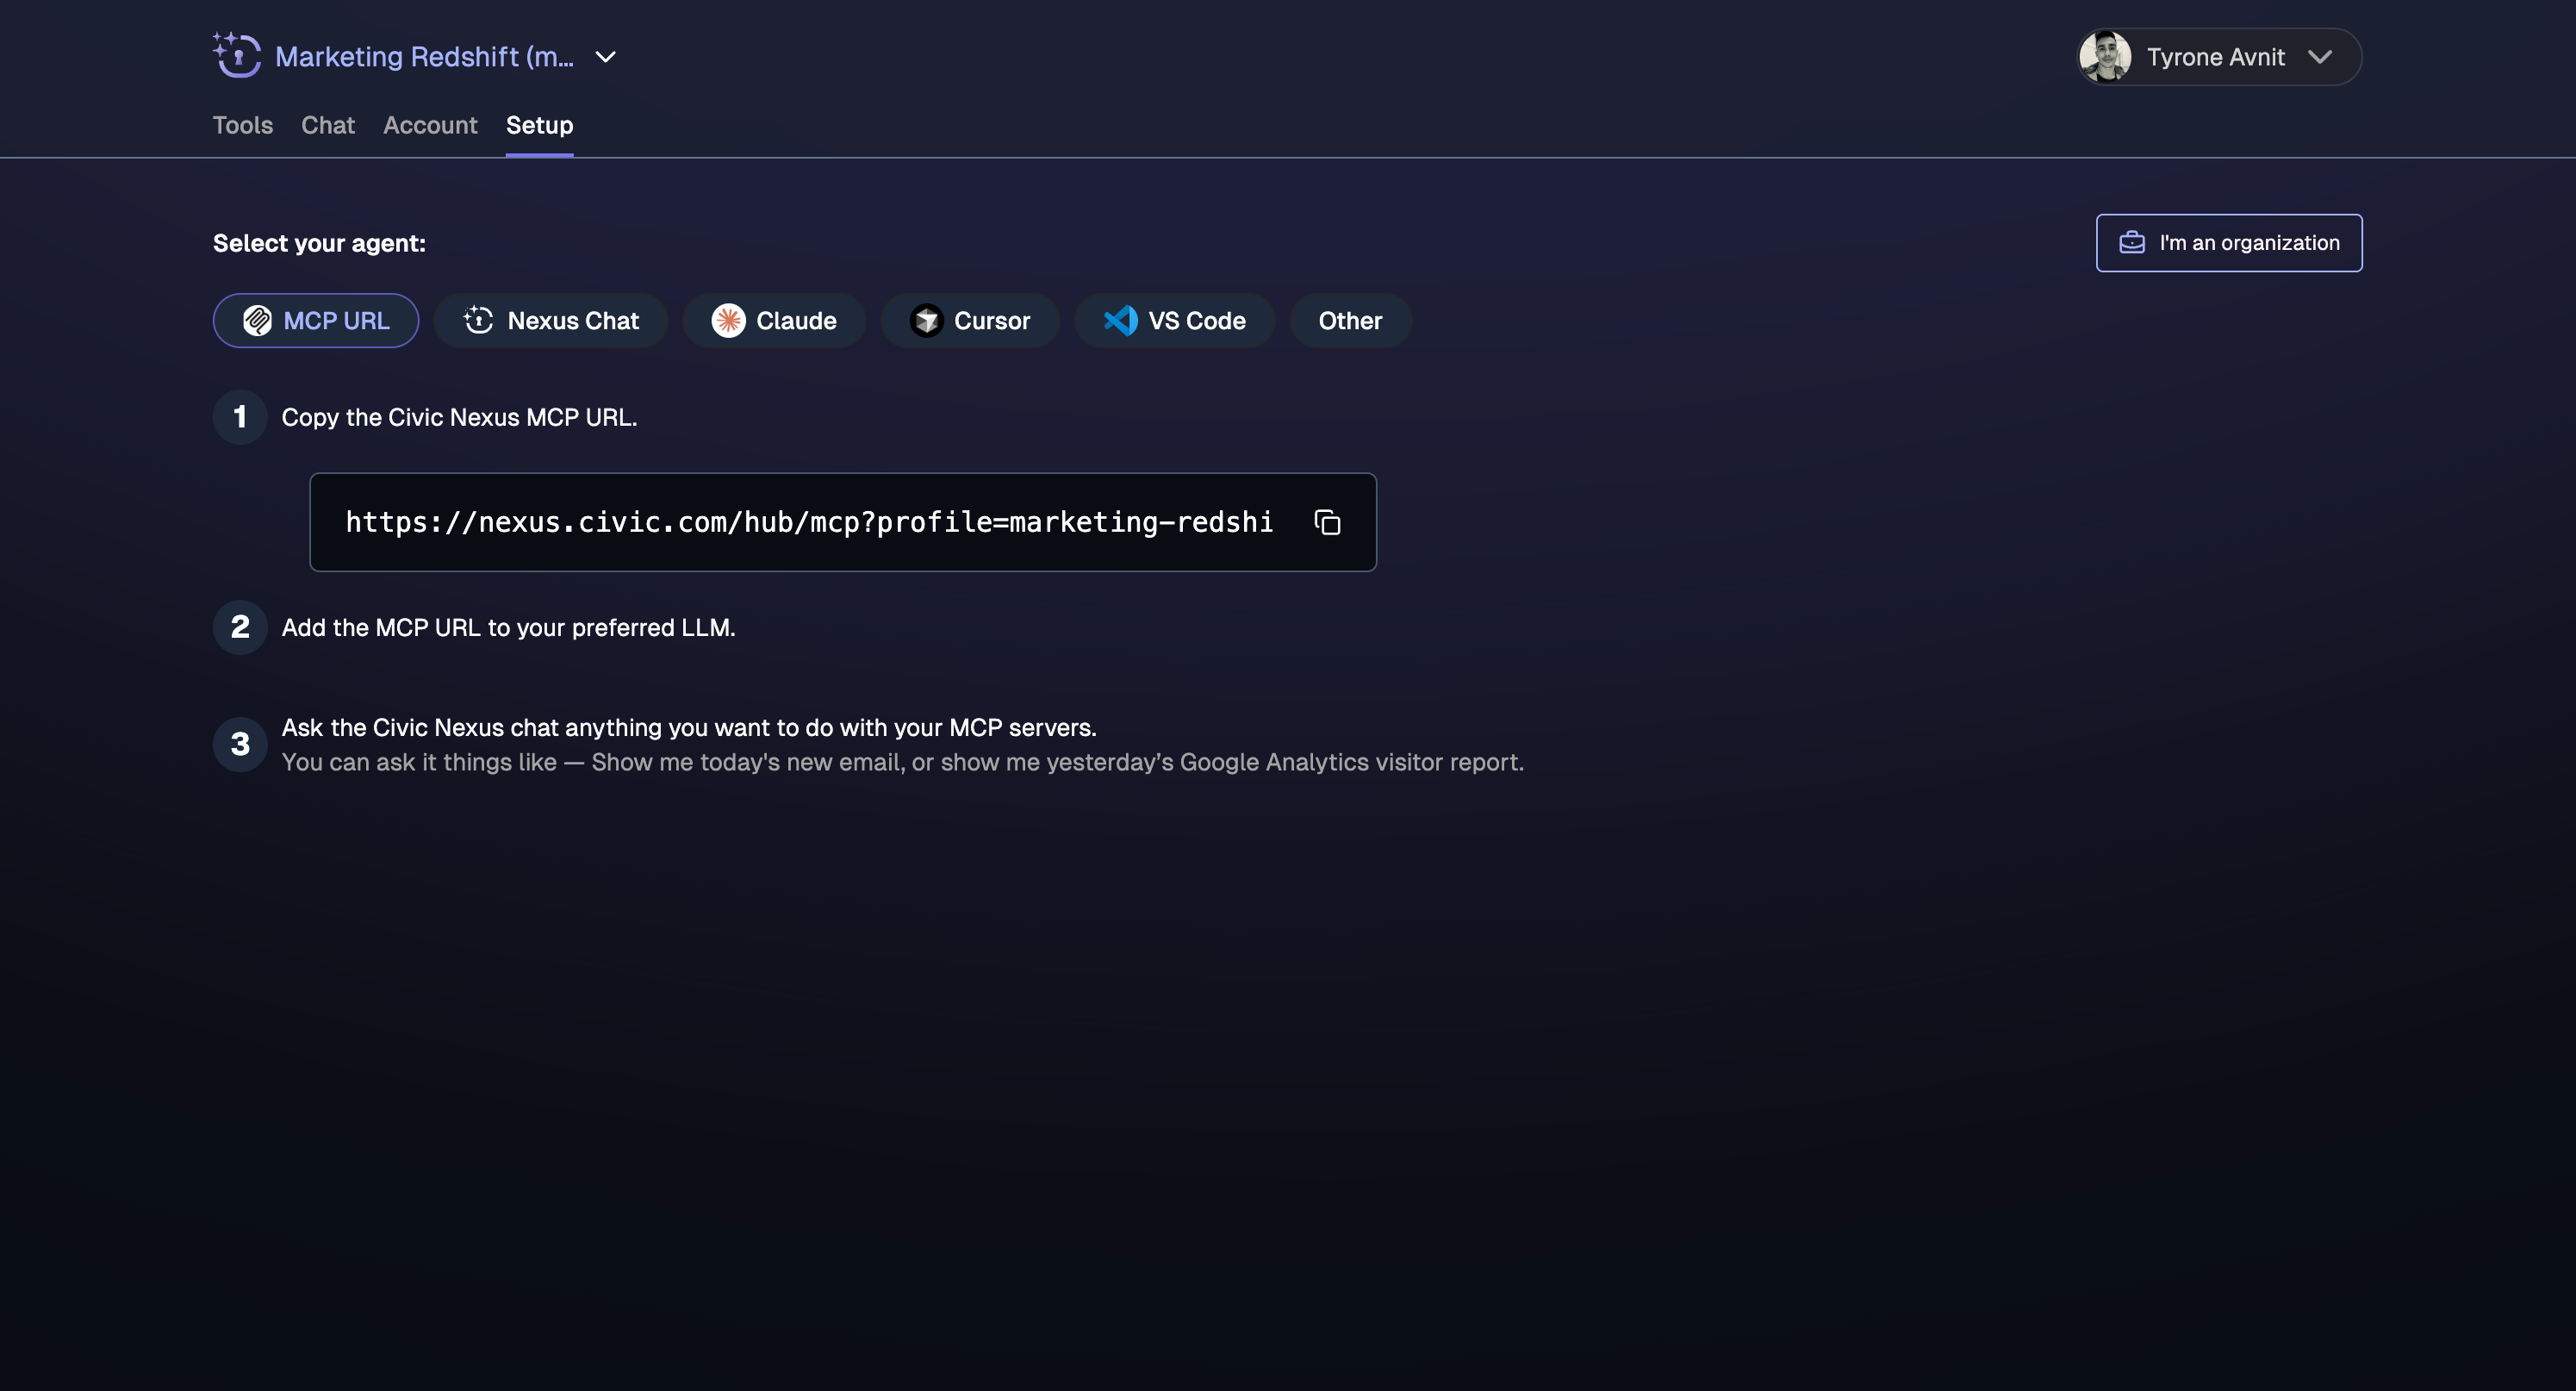
Using Toolkits in AI Clients
You have two main ways to work with toolkits:Method 1: Direct URL Connection
Use your toolkit’s specific URL when setting up MCP connections in clients like Claude Desktop, Cursor, or VS Code.Method 2: Switch Toolkits in Civic UI
If you’re using Civic Chat or managing multiple toolkits, you can switch between them using the dropdown in the Civic interface. Simply select the toolkit you want to use from the toolkit selector in the top navigation.Toolkit Management
Adding Tools to a Toolkit
Adding Tools to a Toolkit
Navigate to your toolkit and click “Add Tools” to select from your connected services. You can add or remove tools anytime without affecting your AI client connections.
Editing Toolkit Names
Editing Toolkit Names
Click on your toolkit name to edit it. The URL alias will update automatically, but existing connections will continue to work.
Sharing Toolkits
Sharing Toolkits
Connecting the Same Service with Multiple Accounts
Connecting the Same Service with Multiple Accounts
Each toolkit maintains its own set of authorizations. This means you can connect the same MCP server (for example, Slack) to multiple toolkits using different credentials — such as one toolkit for your own workspace and another for a client’s workspace.To connect the same service with different credentials across toolkits:
- Switch to the first toolkit using the toolkit selector in the top navigation.
- Add the MCP server for the service.
- Go to Authorizations, find the MCP you just installed and click on it. When it opens you will see a card that says Level: Authorization access level. Click the drop down and select Toolkit level.
- Complete the OAuth authorization flow. The credentials are stored against this toolkit only.
- Switch to your second toolkit and repeat steps 2-4 with the different account credentials.
Default vs Toolkit URLs
Default vs Toolkit URLs
- Default URL: Gives access to ALL your connected tools
- Toolkit URL: Gives access to ONLY the tools in that specific toolkit
- You can use both simultaneously in different AI clients
Filtering Tools in Toolkits
Filtering Tools in Toolkits
One of the most important factors in the accuracy of an LLM is the amount of tools it has access to.
The more tools, the more likely it is that it will pick the wrong one.Some MCP servers include a large number of tools, only a few of which may be relevant to your use case.Narrow down your toolkit by asking the AI to filter tools based on usage or specific functionality.
The filtered selection is saved to your toolkit.Sample prompts:
- “This toolkit has too many tools. Please select only the ones related to generating reports and store that against the toolkit”
- “Please filter out any tools we did not use in this interaction, and store that against the toolkit”
Presetting Parameters
Presetting Parameters
You can train the LLM to use tools the way you want them.If a tool, or set of tools, includes a parameter, that you always want set to a specific value,
you can prompt the LLM to preset it.The AI will automatically use these presets when calling those tools.
Presets act as hard overrides. The LLM cannot change them during tool execution.Sample prompts:The LLM now sees an
Sample prompts:
- “From now on, in this toolkit, always use property ID xyz when using Google Analytics”
- “Preset the log groups parameter to this list: [log-group-1, log-group-2, log-group-3] when executing log queries”
- “Always use the production database connection for queries in this toolkit”
Interpolated parameters
Interpolated parameters let you define a template with placeholders that the LLM fills in at call time. This constrains how the tool is used without exposing the full underlying parameter.Syntax: Use${variableName} as a placeholder in your template value. The system exposes variableName to the LLM instead of the original parameter.Example — SQL query scoped to a specific table:Preset the sql parameter of a Postgres tool to:email parameter instead of the raw sql parameter. It can only query the users table with that exact shape.The escape field is required. It controls how the LLM-provided value is sanitized before interpolation:| Mode | Use for |
|---|---|
sql | Values inside single-quoted SQL strings |
shell | Shell command arguments |
path | Filenames within a fixed directory — strips ../ traversal |
url | URL query parameter values |
html | HTML text content |
alphanumeric | Strictest — only a-z A-Z 0-9 @ . - _ |
- “Please preset the Postgres execute_sql tool to get the total number of users from the users table with a given email domain”
- “Preset the file read tool to only allow access to files inside /data/reports/ with a filename I provide”
Toolkit Descriptions
Toolkit Descriptions
If you are building a toolkit for a very specific workflow or set of workflows, you can add useful context to the toolkit, and it will be provided to the context when connecting Civic.Sample prompts:
- “In this toolkit I will be checking for new issues from my incident manager, investigating in Github, and posting my findings to the project management service. Please set the toolkit description to summarise that process and provide instructions to the LLM when using it.”
Aliasing Tools
Aliasing Tools
Aliasing tools is useful if you have a specific workflow in mind, and helps improve tool selection accuracy by refining the tool name to match that description. For example, if you have a ticket manager and incident manager in the toolkit, you may have two “get-issue” tools - but you can rename one to “investigate-alert” and the other to “check-ticket”.Sample prompts:
This is particularly useful when combined with the preset parameter feature, to convert a generic tool to a targeted one.
- Step 1: “Please preset the Google Analytics create-report tool with the following report parameters:
...and the following property id...” - Step 2: “Please rename the create-report tool to ‘get-24h-web-funnel-statistics’”
Cloning Tools
Cloning Tools
Clone a tool to give it another name, while keeping the original intact. This is useful when you want to create a specialized version of a tool without losing access to the generic one.Sample prompts:
- Step 1: “List all my calendars”
- Step 2: “Please clone the list-events tool as ‘list-my-events’ and preset the calendar ID to my primary calendar”
Custom Tool Descriptions
Custom Tool Descriptions
Tool descriptions are determined by Civic and the MCP server providers, and provide only generic usage instructions to the LLM by default. Custom Descriptions combine with the other features to allow you to refine the tools to your specific use-case, by giving the LLM hints as to how you like to use the tools.Sample prompts:
- “Please update the slack get-messages tool description to look in the following channels: …”
Best Practices
Keep Toolkits Focused
- 3-5 tools maximum per toolkit for best AI performance
- Choose tools that naturally work together for specific workflows
- Remove tools you don’t need by asking the LLM to filter them out
Use Descriptive Names
- Good: “Customer Support Kit”, “Marketing Analytics”, “Dev Debug Tools”
- Avoid: “My Tools”, “Work Stuff”, “Toolkit 1”
Organize by Workflow, Not by Service
- Think workflow: “Content creation process” → Linear + GitHub + Slack
- Don’t think service: “All my productivity tools” → 15+ different services
Test Your Combinations
- Try asking your AI to perform typical tasks with your toolkit
- Adjust the tool combination if the AI seems confused or chooses wrong tools
- Remove tools that don’t add value to the specific workflow
Configure your Toolkit
- Use broad toolkits to help figure out what you want, then bake the ones you need into a new toolkit
- Ask the LLM to configure itself. Once you have a process that works well for you, ask it to create a new toolkit and configure the toolkit data to help the LLM to reproduce it
Stay Safe
- Parameter presetting and tool filters can be used as guardrails
- An LLM cannot use tools that you filter out, or override parameters you preset
- For more fine-grained guardrails, ask the LLM which guardrails are available to it
- Do not use descriptions as guardrails
- Unlike tool filters and parameter presets, descriptions are guidelines only and LLMs can ignore them.
Guardrail execution order
When multiple guardrails are active, they run in ascendingexecutionIndex order. The recommended convention is:
- 0–999 — security constraints (run first to block or redact sensitive data)
- 1000+ — response transforms / post-processors (run after constraints)
Deleting a toolkit
When you delete a toolkit, its chat history is not lost — existing chats are reassigned to the default toolkit so they remain accessible. The default toolkit cannot be deleted.Common Toolkit Patterns
Based on popular MCP server combinations, here are proven toolkit patterns:Analytics & Reporting
Pattern: Data source + Documentation + CommunicationExamples:
- Google Analytics + Notion + Slack
- PostgreSQL + Linear + GitHub
- CoinGecko + Notion + Discord
Development Workflow
Pattern: Code repository + Database + Issue trackingExamples:
- GitHub + PostgreSQL + Linear
- GitHub + Sentry + Notion
- GitHub + HubSpot + Slack
Customer Operations
Pattern: CRM + Documentation + CommunicationExamples:
- HubSpot + Notion + Slack
- ActiveCampaign + Linear + GitHub
- Dropbox + HubSpot + Notion
Next Steps
Test and Refine
Use your toolkit with your preferred AI assistant and adjust the tool combination as needed
Need Help?
Join our developer community if you need assistance creating effective toolkits for your workflows